
- Published on
The workshop is hot today. Not only are we hitting weather highs in the nineties , I have found myself under a welding mask creating fireworks welding. I have to be careful I might just slip on my own puddles of sweat.
I'm welding together framework for a faux bois table. You often see faux bois in historic gardens as benches and archways and in theme parks as railing and fake trees.
I'm welding together framework for a faux bois table. You often see faux bois in historic gardens as benches and archways and in theme parks as railing and fake trees.
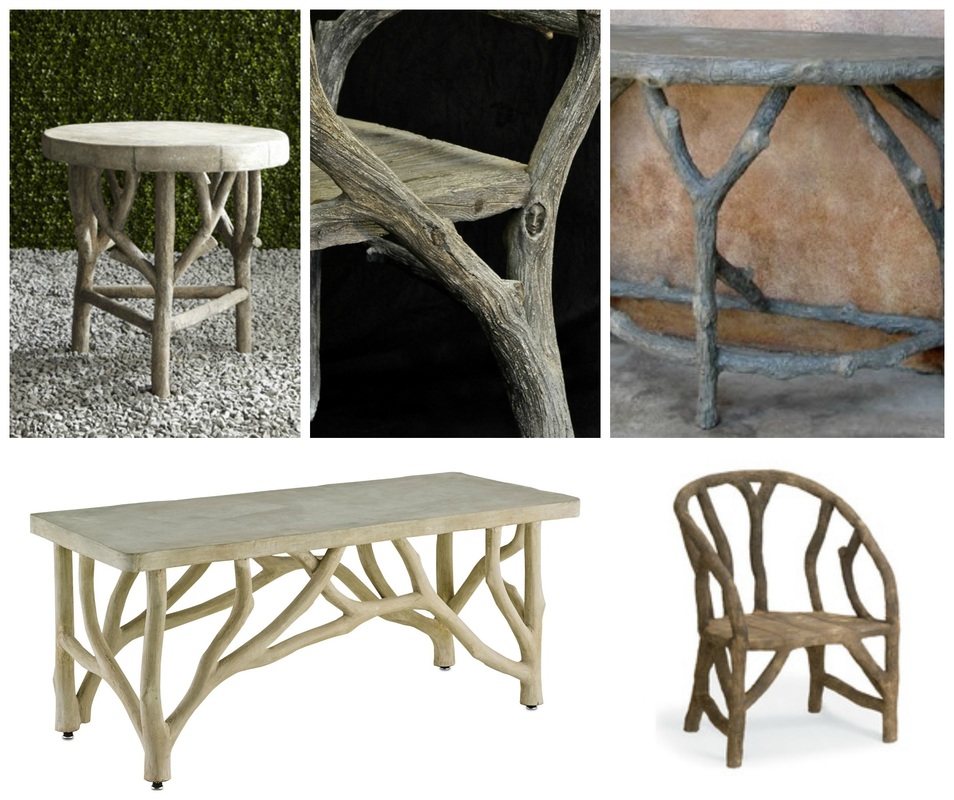
I'm using these images as references for my faux bois creation. Notice how each of the pieces replicates wood from different tree species.
While I've sculpted many things in my life, this is my first attempt at cement furniture. Hey, I just dive in with both feet. I've worked with cement before. I sculpt trees from other materials all the time. Why not combine the two?
This table is destined for a retail boutique. It will be merchandised on as a fixture. I'm personally handling the store design for the owners. I want a variety of textures, finishes and hand wrought signature pieces throughout. I'll journal about the store soon, as we are just beginning construction.
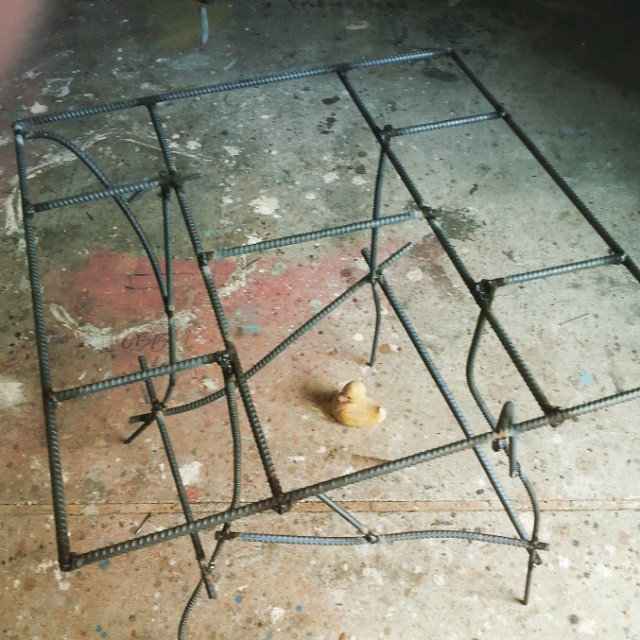
Here's my finished armature. I will be wrapping it in metal mesh to provide stability and a surface for the cement to adhere to.
This table is destined for a retail boutique. It will be merchandised on as a fixture. I'm personally handling the store design for the owners. I want a variety of textures, finishes and hand wrought signature pieces throughout. I'll journal about the store soon, as we are just beginning construction.
Here's my finished armature. I will be wrapping it in metal mesh to provide stability and a surface for the cement to adhere to.
As a feature in the garden, faux bois was very popular in the 1940's. If you own a vintage piece you are very lucky. Given most pieces were exposed to the elements, many have degraded and sadly disappeared.
I'll pop back in and update this journal entry with progress pictures. I'd love to hear from you if you own a piece. I'd be curious how you came to own it.
I'll pop back in and update this journal entry with progress pictures. I'd love to hear from you if you own a piece. I'd be curious how you came to own it.
Update- July 3rd
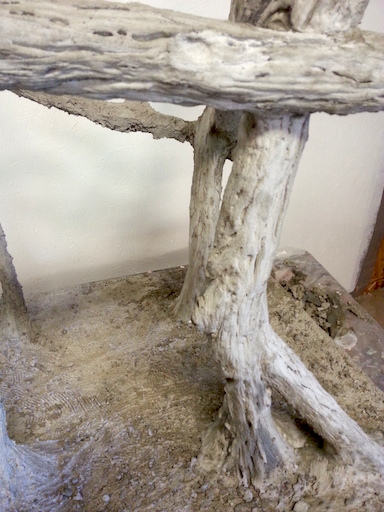
Two coats are visible: The first is the coarse coat on the branch in back. The finer coat that is sculpted is in the foreground. This is were the wood details are added.
I neglected to take a picture of the piece wrapped in metal lathe. I was just so excited to get into it. The first coat of cement was to cover the rebar and the lathe. I also shaped the first coat to start creating some of the twists, turns and scars one would see on an old branch. In the photo above you can see the rough first coat in the back (the darker horizontal branch) The two foreground branches are after the second coat which is a finer mortar mix. Once that mortar sets up a little I started carving, brushing and stamping details. I'm excited how much they look like old driftwood with the natural cement color. Once the finished piece is stained they will look more like a wood in tone. More updates soon...
update - July 7th
The legs have dried thoroughly so it was safe to finally flip it right side up. Now I will start applying mortar to the top and sculpting it.
0 Comments